It all started when nail art pens, stickers and Pinterest were invented. Wearing an electric bright pink shade is no longer enough to stand out and be different. With these creations, the world of nail polish has become quite abstract and almost verging on the brink of an art form. Nail polish trends are coming and going quickly, just like fashion, and girls enjoy trying out the next big thing from the comfort of their homes (or dorm rooms)!
We are going to highlight two nail trends for you to try. Hopefully, it can help put the “shatter” polish and ring finger alternative color trends to rest.
The first trend is known as “marbling.” This offers a one-of-a-kind design for every nail that can’t be recreated. At first, you may be a bit unsure of how to get a cool design, but if you keep at it, many girls figure out how to make their polish do exactly what they want.
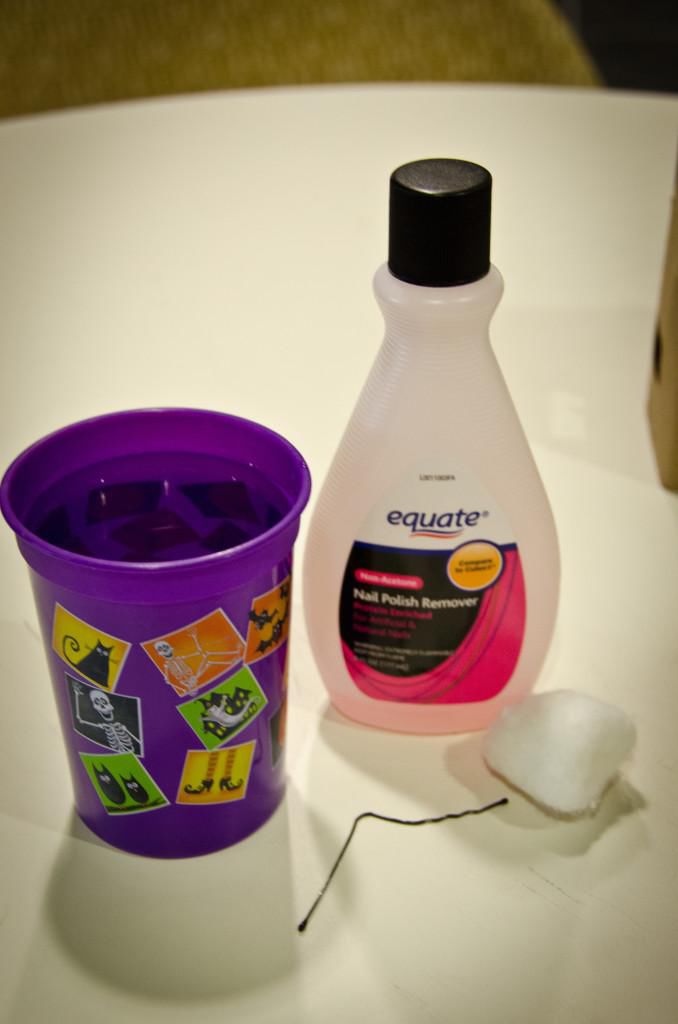
You will need white nail polish, a small cup or plastic bowl, filtered water, a toothpick or sharp pointed object you would be okay with getting messy (we used a bobby pin), nail polish remover and three shades of solid-colored nail polish.
First, you want to paint your nails white. Having white as a base coat makes the colors show up much better than on a plain nail. Next, fill the small container with the filtered water. Take one of the nail polishes and put a drip of it on the water. You will be able to see it start to spread out across the surface of the water. Drip another color into the middle of the color already on the water. This will spread as well. Repeat with the third color.
Take the toothpick (or bobby pin) and gently make any design you want in the colors. Be careful not to break up the colors too much and keep the layers of color at the top of the water.
Dip one or two of your nails on top of the colors, being sure not to wiggle your fingers too much, as it will disrupt the polish and could possibly create bubbles. Be careful when pulling your finger out of the cup as to not smear or run the colors together.
You will definitely have excess color show up on your skin surrounding your nail. Carefully remove it with nail polish remover when you are done with the process. Put a clear top coat on your nails to seal them and make them shiny.
Our nails didn’t turn out exactly how we thought they would, but that’s half the fun of the process. It’s always a surprise.
However, if you want complete control over your manicure, the next trend is perfect for you. This is called “newspaper nails,” and it is exactly what it sounds like. This is a perfect mani to do right before you recycle your last issue of The Bulletin.
You will need an old issue of The Bulletin (or any newspaper), nail polish remover, alcohol solution, cotton buds, a clear bowl, a base and top coat and a very pale-colored nail polish. You could always try a brighter color, but the louder the color underneath the print, the less you will be able to see the design.
First, you will need to apply your base coat and your nail polish color of choice. We used a very pale (almost sheer) pink. While you are waiting for your nails to dry, you can rip up small bits of the newspaper.
After your nails are completely dry, pour a small amount of the alcohol solution into a clear bowl. We recommend a clear Tupperware-like container because it is easy to make sure your entire nail is covered in the alcohol solution when you dip your finger in.
As soon as you take your finger out of the alcohol solution, place one of the strips of newspaper on top of your nail, making sure to apply even pressure to all parts of the surface. If you only press down on the center of the paper that is the only place that the ink will transfer. Repeat this for all of your nails.
We found that too much alcohol solution and too little alcohol solution made the transfer process difficult, so be sure to play around with how much you dry off your finger before applying the newspaper. Be sure to seal your design with a top coat.
We hope that these tips give you some inspiration for unique nail art personalized for you!